RGB lighting dominates PC customization innovation. It’s ideal for personalizing and beautifying your devices. Welcome to “What Can I Hook Up To The Motherboard RGB Header?” This question primarily depends on the RGB fan you buy. The fan will spin on a motherboard without an RGB header. However, the RGB may not operate.
This article explains how to attach RGB fans to your motherboard, what components you need, and how to install them correctly. These clear instructions will let you connect RGB fans quickly. First, we’ll explore RGB fan types.
What Is An RGB Header On The Motherboard?
An RGB header is on most computers these days. It gives 12V DC power to RGB devices like fans and strips and sends data for red, green, and blue channels. Three types of RGB fans can be connected to the computer. Three kinds of RGB fans
- RGB fans with 3 pins.
- RGB 4-Pin Fans.
- RGB fans that don’t have heads.
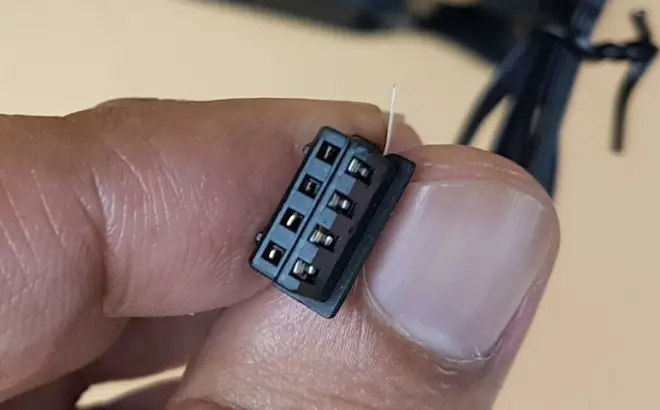
4. Take-Away Fan Connector:
- Make sure the power cord to your CPU is unplugged.
- Keep the RGB fans away from the motor.
- Make sure the RGB fans are not near any liquids.
- Don’t let RGB lights get hot. For safety reasons, please keep it away from any machine that can make it too hot.
What Can I Hook Up To The Motherboard RGB Header?
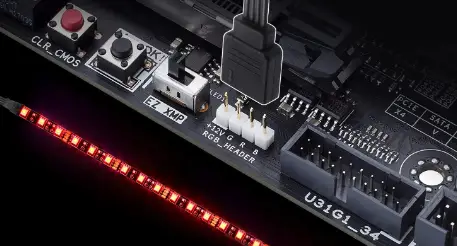
A 4-pin header is usually used to add RGB fans to the motherboard. Pin 1 is +12V, Pin 2 is the tachometer (speed sensor), Pin 3 is ground, and Pin 4 is the signal for controlling the speed of the fan and the RGB lights.
Now the question is:
How Can I Connect 4-Pin RGB Fans To The Motherboard? 4 easy steps
Here’s how to hook up 4-pin RGB fans to a motherboard:
1. Research how well they work together.
When adding 4-pin RGB fans to a motherboard, any PC builder must ensure they work with it. The 4-pin link has been the standard for RGB fans because it works with most RGB headers built into motherboards.
It is essential to know what connections your processor can handle and whether the fan you want to use will work with them. No matter how simple or complex your setup is, the study can help you ensure that all of its parts work together perfectly from beginning to end.
Luckily, many computer makers put detailed specs online and in user manuals so people can check to see if their gear will work with what they want to buy before they buy it.
2. Hooking up the RGB cable:
You first need to find a place on your motherboard where the RGB cable can join. Setting up 4-pin RGB fans only takes a few steps with the proper connection.
The first thing you need is an RGB fan with a 4-pin socket. This will fit into the header on your hardware. First, plug one end of the 4-pin RGB wire into the fan’s port.
Then, plug the other end into your motherboard or controller, depending on what’s available in your system.
3. Hook up the fan to the power source:
Getting the fan hooked to a power source is essential before starting. It’s important to know what voltage level the fan needs to run safely before you connect it to a power source.
You can then connect the other two pins of your 4-pin RGB fan to a 12V or 5V SATA connection on your PC’s power supply unit (PSU). Just insert two of the fan’s pins into an available header on your motherboard.
4. Install the software and set up settings:
You must install tools and settings to connect 4-pin RGB fans to your motherboard for the best performance. You can change your computer’s appearance with RGB fans, which are also needed to keep the internal parts cool.
If you want to get the most out of your RGB fan setup, install the software and set up the settings. The fourth thing you need to do to put 4-pin RGB fans on your motherboard is to get the right software from the manufacturer’s website.
Carefully follow all the steps to install this software on your computer after downloading it. After they are loaded, you must change the settings so that they work with your motherboard.
Read Also: how to connect lian li fans to motherboard?
How To Connect 3-pin RGB Fans To The Motherboard? 5 Simple Steps
Here’s how to hook up 3-pin RGB fans to a motherboard:
1. Hooking up the RGB cable:
It would help if you learned more about basic computer technology to connect the RGB cable to 3-pin fans. To begin, match the end of your RGB wire to the correct port on your motherboard.
If you have a certain kind of motherboard, this could be a three- or four-pin RGB header with the letters “RGB” or “ARGB” written next to it. As soon as you find this port, plug in one end of the wire until it clicks firmly into place.
2. Putting software on the motherboard:
It’s easy and doesn’t take much time to install software on the motherboard that lets you add 3-pin RGB fans to the motherboard. Changing and managing compatible RGB lighting on fans is easy with the right settings.
Put in the right driver or program to control and sync these lights. Lastly, set up the settings to ensure everything works right, and then have fun making these lights your own!
3. Making changes to the BIOS:
Changing the BIOS settings makes it easy to connect your 3-pin RGB fan and the cable that goes with it to the computer.
- Start by going into BIOS mode. To do this, press Delete or F2 when the computer starts up. But this is only sometimes the case, and you may need to press a different key to get into BIOS mode on some PCs.
- Select Advanced Mode => Go to the Advanced tab in BIOS mode. After that, find the choice that says “System Agent Configuration” and choose “Graphics Configuration” from that list. Then, ensure that the Primary Display Port, PCI Express Slot State, and the Internal Graphics Mode Option are set to “Enabled.”
- Finally, press F10 and Enter to save your changes. Your computer will restart with your new RGB fan settings turned on.
4. Check the speed of the fan:
Connecting 3-pin RGB fans to your processor can get more cooling power and keep your system from getting too hot. You should check the fan speed often to ensure these fans are working right.
It only takes a few easy steps, which can be done in minutes, to test the fan speed. Make sure that all of the cables going to the PC and fan are connected correctly and safely.
Once you’re sure this link is working, use an app to look at the system settings and see how fast each fan runs.
5. Giving Color Modes:
After adding a 3-pin RGB fan to the motherboard, users must know how to set the color modes correctly. People should first download and run software from the manufacturer on their PC if they don’t already have it. Aura Sync from ASUS or MSI Mystic Light Sync can be used for this.
This will give you access to a screen where you can choose different lighting effects and colors for each fan.
Read Also: which statement is true of laptop motherboards?
How do I hook RGB fans to my motherboard if I don’t have headers? Don’t overlook 1st step
You will need to use a fan control hub or an RGB driver to connect RGB fans to a motherboard that doesn’t have headers. These are the steps:
1. Check the type of fan and make sure it works with your system.
First, you must figure out what kind of RGB fans you have. Four-pin RGB fans and three-pin RGB fans are the two main types. Both can connect straight to an RGB controller or a fan control hub.
You must use a fan control hub to connect your 4-pin RGB fans to your processor. This hooks up to a standard 4-pin fan header on the motherboard and lets you manage your fans’ RGB lights.
Some fan control hubs have extra features, like the ability to sense temperature and change the speed of the fans. You’ll need an RGB driver to connect your 3-pin RGB fans to your motherboard.
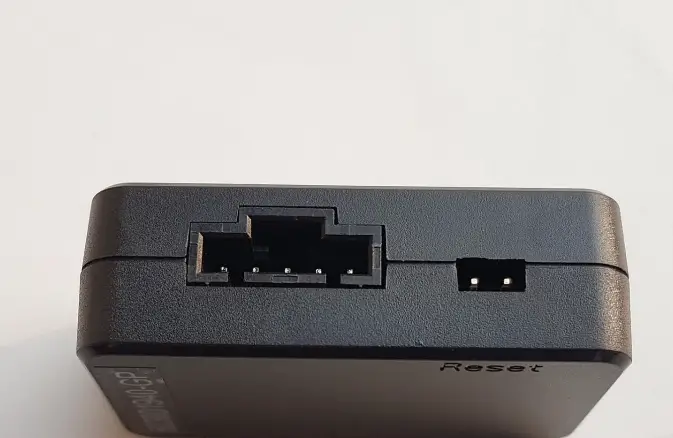
2. Put in the RGB controller or fan control hub
You can start the installation process as soon as you know what kind of RGB fans you have and how to connect them to your computer. Follow the manufacturer’s directions to set up the fan control hub or RGB controller.
3. Hook up the RGB fans:
Next, use the right cables to connect your RGB fans to the fan control hub or RGB remote. Depending on the fans you have, you may need to use either 4-pin or 3-pin plugs for this.
4. Hook up the controller or hub to your home computer:
A standard 4-pin fan header can connect the hub or driver to your motherboard. In this way, you can manage the RGB lighting on your fans using the BIOS on your motherboard or a tool given by the hub or controller’s maker.
5. Change the settings for the lighting:
Once you’ve connected your RGB fans to your motherboard, you can use the BIOS or a software tool to change how the lights work. This usually means picking out the colors and patterns your fans will use and setting up extras like temperature sensors or fan speed controls.
Hence, It’s easy to connect RGB fans to a processor that doesn’t have headers. Carefully follow the manufacturer’s instructions and use the correct wires and connectors to ensure the installation goes well.
How Can Multiple RGB Fans Be Connected to a Motherboard?
The RGB connectors follow the same logic. All the fans’ RGB connectors will connect to a single splitter, extension cable, or hub. This should come with the kit, and the main end of the wire should be connected to one of the RGB headers on the motherboard.
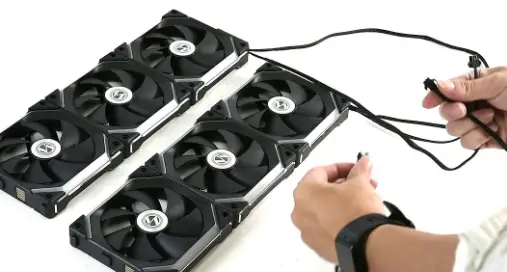
You can sync several fans by connecting them to a single motherboard header and using the remote with static RGB fans. Two wires connect digital RGB or ARGB fans to the motherboard.
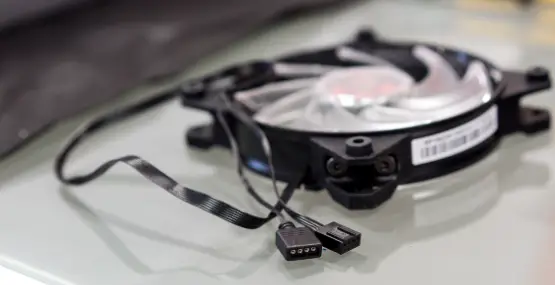
- Power cable for a fan
- RGB power cable
Again, the RGB cable power has two ends.
- 3-pin male
- Female 3-pin
Use these procedures to link several ARGB fans.
- Join the motherboard’s 3-pin female connector.
- Join the 3-pin male connector of one ARGB fan to a 3-pin female connector of another.
By reusing these two processes, we can daisy-chain many ARGB fans together. Connecting RGB Fans to a Motherboard That Doesn’t Support Them:
With the help of a driver with the RGB fan strip, you can connect it to a motherboard that doesn’t support RGB. But it can be challenging to add an ARGB fan to a motherboard that isn’t RGB.
Because an ARGB fan’s LED power connection needs to connect to a 3-pin 5V header, this header is not included on a motherboard that is not RGB.
Difference between LED and RGB Fans:

We can’t change the color of the LED fans, which only come in one color. Because of this, the RGB program won’t work on these fans.
RGB fans can show Red, Green, or Blue, unlike LED fans. Even though RGB fans don’t move, we can change their color with the RGB control app. But we can’t change each LED light separately on RGB.
Which Light is Better: RGB or ARGB?
ARGB LED lights can be controlled by an address, but standard RGB LED lights cannot. PC builders prefer ARGB lights over Static RGB lights for this reason alone. But there are also benefits to RGB lights.
RGB lights need a controller that lets you handle all of the RGB lights on your system. So, you don’t need an app from someone else to control these lights. RGB is the way to go if you want to control your lights mechanically.
We can also add a switch to handle an ARGB light, but using a third-party app for ARGB lights makes more sense. Also, if your motherboard isn’t RGB, you can only get RGB on your machine by using RGB lights.
Visual Difference Between RGB and ARGB
| RGB Type | Power Cable Wires |
| Static RGB | 4 |
| ARGB | 3 |
Look at the power cable that must be linked to the motherboard to determine which RGB type you need. You can’t tell if an RGB strip is static or ARGB just by looking at the end where the connection goes.
Even though the end of an RGB cable and an ARGB cable look the same, they have different numbers of wires. ARGB will have a power cord with three wires, while Static RGB will have four. We can also use the same method to tell the RGB fans apart.
Conclusion:
So, You can easily find the correct parts and connectors to connect RGB fans to your motherboard if you have the required knowledge. Ensure you use compatible parts and that your chosen connection type is right for your system. Before turning on your device, make sure all connections are verified. Spend some time experimenting with different ways to connect the RGB fans for an unusual appearance.
FAQs:
Q1. Why is there an RGB port on the motherboard?
RGB devices like fans and strips with 12V DC power and giving them data for the red, green, and blue color channels.
Q2. Do I need to connect the RGB header?
ARGB fans are digital and run on 5 volts, while RGB fans are mechanical and run on 12 volts. That’s why you shouldn’t plug an RGB fan into an ARGB header; you could hurt both the fan and the header. An RGB fan needs to be put into an RGB header, and an ARGB fan needs to be plugged into an ARGB header.
Q3. How do I hook up my GPU RGB cable?
Click the 1×3-pin connector on the graphics card and the free USB 2.0 pin header on the motherboard to connect the RGB control wire.
Q4. What does an ARGB driver do?
The Cooler Master ARGB LED Controller is a small Addressable RGB LED Controller hub (ARGB) that makes it easy to customize ARGB devices without requiring software or systems compatible with ARGB. With different lighting settings, users can fully customize the effects of PC LED lighting.
Q5. How do I connect to the RGB header?
A 4-pin header is usually used to add RGB fans to the motherboard. Pin 1 is +12V, Pin 2 is the tachometer (speed sensor), Pin 3 is ground, and Pin 4 is the signal for controlling the speed of the fan and the RGB lights.